Is your website running slow? The main reason can be very old outdated PHP version of your website. This guide will show you how to change PHP version in Hestia Control Panel and smoothen your website’s speed easily.
Steps to Change PHP Version in Hestia Control Panel
1) Firstly login to the Hestia Control Panel.
2) Enter your “admin username” and “password”, then click on the Login button.
3) Once logged in, click on the “Users tab” located in the top menu.
4) Select the “User“ for whom you want to change the PHP version.
5) In the user dashboard, find and click on the Web tab
6) Identify the domain or website associated with the user where you surely want to change the PHP version.
7) Click on the “domain name” or the “Edit” button next to it to access its settings.
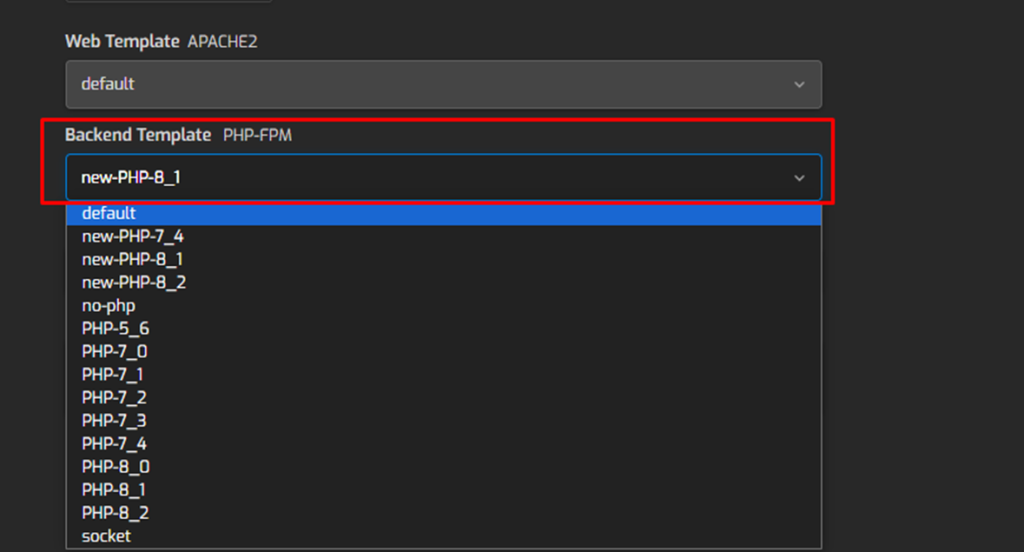
8) Change “PHP Version”.
- Look for the PHP Version or PHP Settings section.
- There should be a drop-down menu or similar option that allows you to select the PHP version.
- Choose the desired PHP version from the available options. Hestia Control Panel usually offers a selection of installed PHP versions.

9) After selecting the PHP version, click on the “Save” or “Update” button to apply the changes.
10) Verify that the PHP version has been successfully changed by accessing the website associated with the user.
- Test to ensure that the website functions correctly with the newly selected PHP version.
Using the above steps, you can indeed change the PHP version for a user in the Hestia Control Panel.

