Does your WordPress website facing timeouts or issues due to long running scripts then follow this simple guide to change PHP time limit for your WordPress website using CyberPanel and which allows your website to handle complex tasks without interference.
Steps to Change PHP Time Limit for WordPress
1. Open your web browser and navigate to your CyberPanel URL (e.g., https://yourdomain.com:8090).
2. Log in using your admin username and password.

3. Once logged in, find and click on “PHP” from the left-hand menu.
4. Select Edit PHP Configs to adjust the PHP configurations.

5. On the PHP configurations page, choose the PHP version you want to modify.

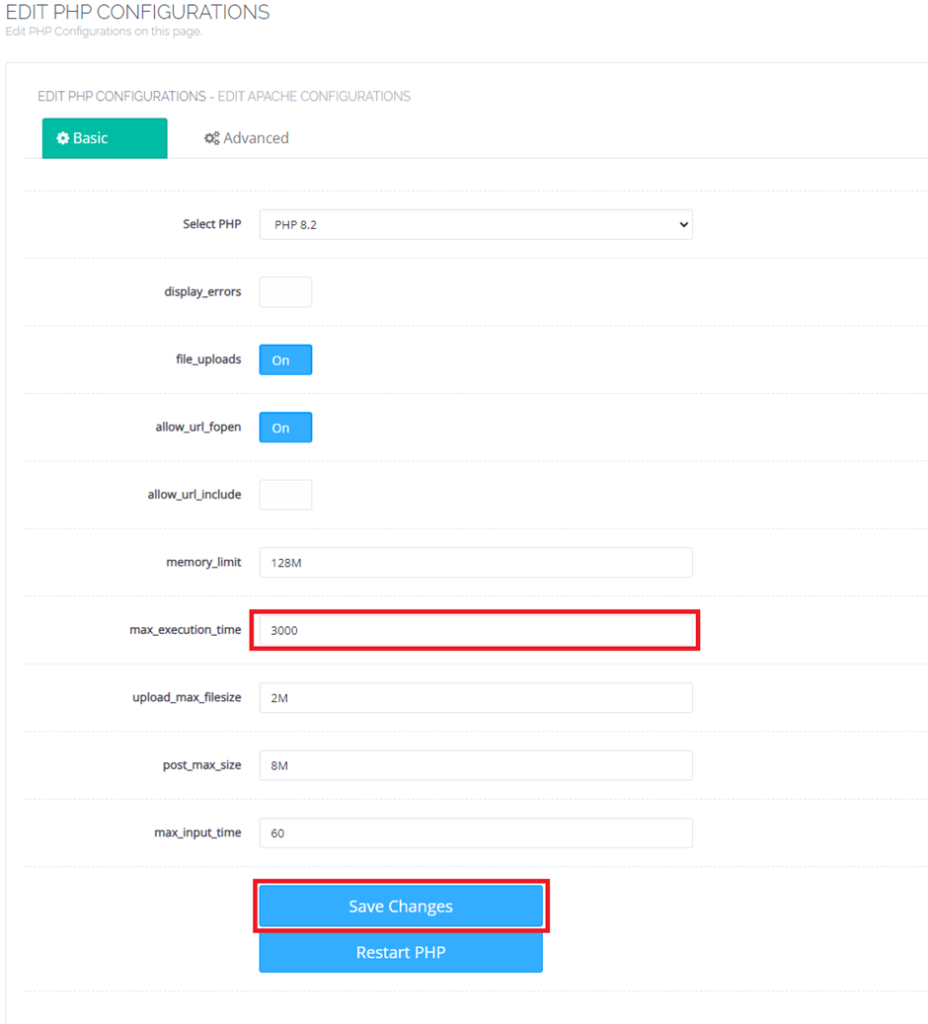
6. This will expand the option to edit PHP configuration. Locate the parameter related to max_execution_time. This setting determines the maximum time in seconds that a script can run before being terminated by the server. Modify the value to your desired time limit. For instance, to set it to 3000 seconds (50 minutes), change it to max_execution_time = 3000.

7. After adjusting the PHP time limit, scroll down and click on “Save Changes” to apply the new configuration.
By following these steps, you can effectively adjust the PHP time limit for WordPress or any other PHP-based applications hosted on CyberPanel to meet your specific requirements.

