cPanel hosting is a popular web hosting solution that provides users with a graphical interface for managing their websites and accounts. While cPanel is a powerful and versatile tool, it is important to secure your cPanel hosting account to protect your website and data from cyberattacks. In this blog post, we will discuss the best practices for securing your cPanel hosting account in 2024. Furthermore, these best practices include using strong passwords, enabling two-factor authentication, keeping your cPanel software up to date, and using a firewall.
What is cPanel Hosting?
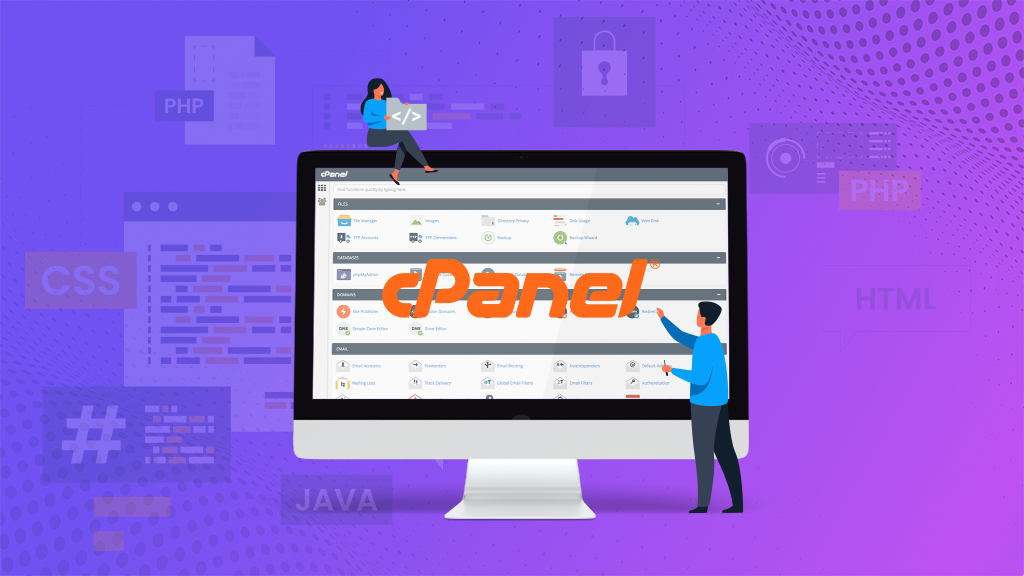
cPanel hosting is a type of web hosting that uses the cPanel control panel to manage websites and accounts. cPanel is a graphical user interface (GUI) that provides users with a variety of tools for managing their websites, including:
- File management
- Database management
- Email management
- Domain management
- Security features
- Software installation
- Performance monitoring
cPanel hosting is a popular choice for both beginners and experienced webmasters because it is easy to use and provides a wide range of features. cPanel is also compatible with a variety of popular web hosting platforms, including Linux and Windows.
Advantages of cPanel Hosting
Navigating the digital landscape becomes a breeze with cPanel hosting, a robust solution offering a plethora of benefits for website management and hosting account administration.
1. Intuitive Interface
Dive into hassle-free website management with cPanel’s user-friendly Graphical User Interface (GUI). Even for beginners, the intuitive design simplifies the complexities of hosting account management, ensuring a seamless experience.
2. Comprehensive Feature Set
Elevate your hosting experience with a rich array of features provided by cPanel. From efficient file management and database administration to streamlined email management and robust website security features, cPanel is indeed a one-stop solution catering to diverse needs.
3. Cost-Effective Solution
Discover affordability without compromising quality. cPanel hosting is known for its cost-effectiveness, providing excellent value for your investment. Whether you’re a small business owner or an individual with a personal website, cPanel hosting offers a budget-friendly option without sacrificing performance.
4. Thriving Community Support
Join a thriving community of users and developers that form the backbone of cPanel’s success. Benefit from a vast pool of knowledge and expertise as the community actively contributes to support forums, troubleshoot issues, and introduce innovative features. The strength of this community ensures that users are never alone in their hosting journey.
Features of cPanel Hosting
cPanel stands as a pinnacle in the realm of web hosting control panels, offering users a sophisticated graphical interface to effortlessly manage their websites and accounts. Renowned globally, it is a preferred choice for web hosting providers of all magnitudes, attesting to its universal acclaim.
Key Features of cPanel Hosting:
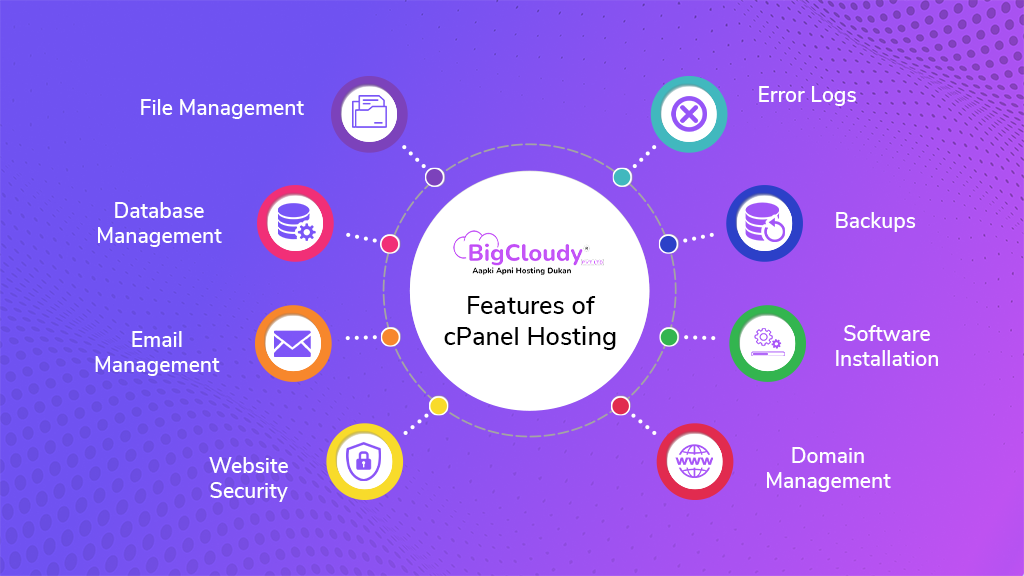
1. File Management
Enjoy seamless control over your web hosting servers with cPanel’s file management capabilities. Users can effortlessly upload, download, and manage files, ensuring a smooth and intuitive file-handling experience.
2. Database Management
Dive into the world of databases with cPanel’s robust tools. Users can surely create, manage, and backup MySQL and PostgreSQL databases, providing a solid foundation for data-driven applications.
3. Email Management
Elevate your communication strategy with cPanel’s email management features. Users can easily create and manage email accounts, implement email forwarding, and set up autoresponders, streamlining their email operations.
4. Website Security Features
On the other hand, prioritize the security of your online presence with cPanel’s comprehensive security suite. Benefit from features like hotlink protection, IP blocking, and SSL/TLS certificates, ensuring a safeguarded environment for your website and its visitors.
5. Domain Management
Take control of your domain names effortlessly. cPanel allows users to manage domains, facilitating tasks such as setting up DNS records and creating subdomains with ease.
6. Software Installation
Empower your website with popular applications using cPanel’s user-friendly software installation feature. Install widely used applications like WordPress, Joomla, and Drupal with just a few clicks, saving time and effort.
7. Backups
Safeguard your digital assets with CPanel’s backup functionalities so that users can efficiently back up website files and databases and even schedule regular backups to ensure data integrity.
8. Error Logs
Troubleshoot issues effectively with access to detailed error logs. cPanel provides users with insights into their website’s error logs, offering valuable information for resolving and preventing potential problems.
Top Security Threats to cPanel Hosting
The most common security threats to cPanel hosting include:
1. Weak passwords
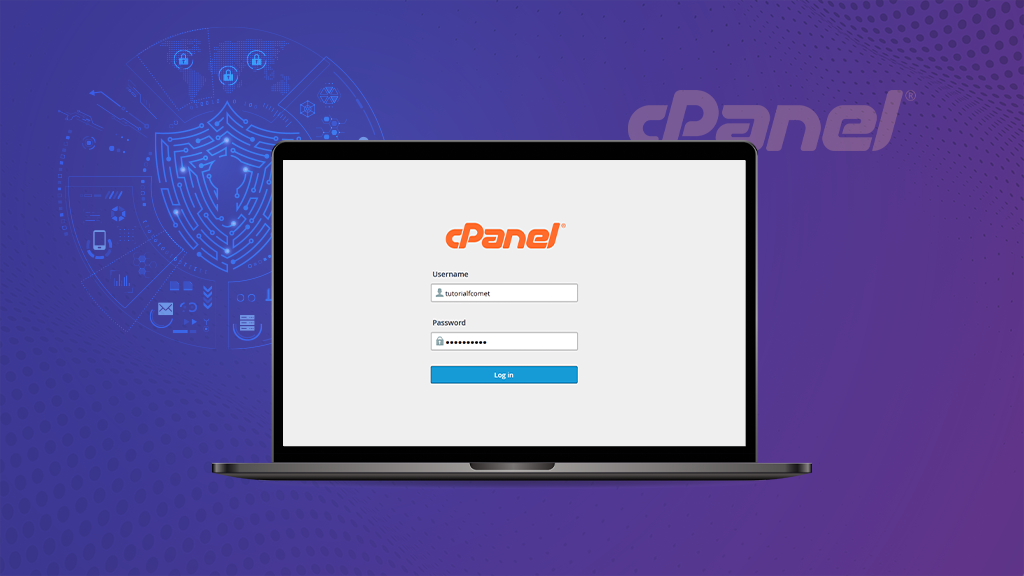
One of the most common ways that attackers gain access to cPanel hosting accounts is through weak passwords.
2. Outdated software
Outdated cPanel software may contain security vulnerabilities that can be exploited by attackers.
3. Unpatched vulnerabilities
Unpatched vulnerabilities in third-party software, such as WordPress plugins and themes, can also be exploited by attackers to gain access to cPanel accounts.
4. Malware
Malware can be installed on cPanel servers in a variety of ways, such as through phishing attacks, malicious file uploads, and SQL injection attacks.
5. Brute-force attacks
Brute-force attacks involve using automated tools to try different passwords until one is successful.
Ensuring the Security of Your cPanel Hosting: A Guide to Regular Updates
1. Regular cPanel Updates
i. Importance
Keeping your cPanel software up-to-date is paramount for maintaining a secure hosting environment. Updates often include crucial security patches that address vulnerabilities, enhancing the overall resilience of your system.
ii. How to Update
Navigate to WHM (Web Host Manager) and follow the path: WHM > cPanel > Upgrade to Latest Version. Alternatively, you can use the following command line for a manual update:
"#/scripts/upcp –force".iii. Automated Updates
To streamline the update process and mitigate the risk of overlooking updates, consider enabling automatic updates. This ensures that your cPanel is consistently fortified against emerging threats.
iv. Action Steps
- Regularly check for updates through the cPanel interface.
- Implement manual updates using the provided command line for immediate reinforcement.
- Simplify the process by enabling automatic updates to guarantee continuous protection.
v. Benefits
- Mitigates security vulnerabilities associated with outdated software.
- Enhances the overall performance and stability of your cPanel hosting environment.
- Demonstrates a proactive approach to cybersecurity, safeguarding your system against potential threats.
2. Strengthen Your Password Security
Passwords serve as the frontline defense against unauthorized access, yet their significance is often underestimated. Weak passwords create vulnerabilities that can be exploited, leading to potential security breaches, compromised client sites, and the dissemination of viruses. An alarming 80% of hacking attempts target sites with inadequately secured passwords.
To fortify your defenses, adhere to the following guidelines:
i. Password Length and Complexity
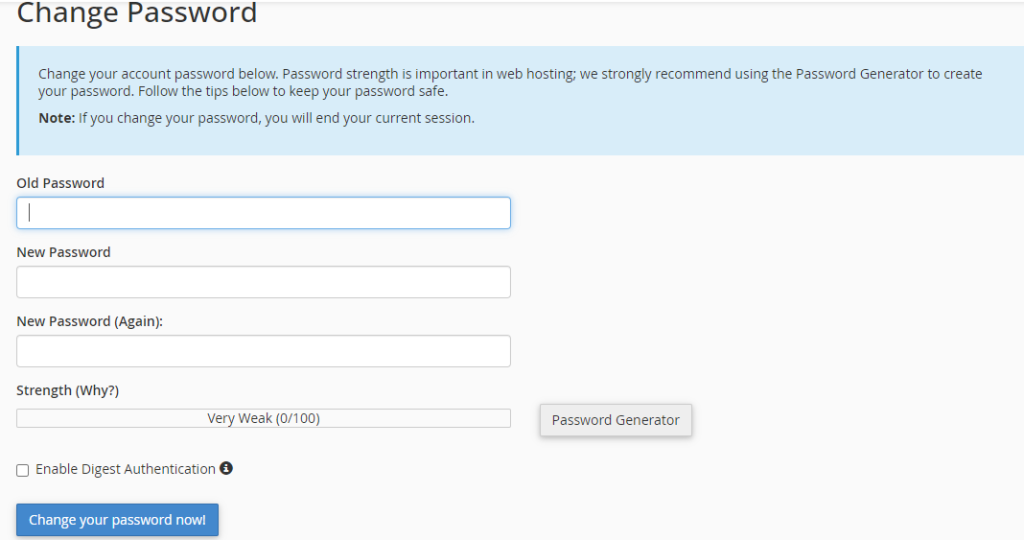
- Configure password options in the “/etc/login.defs” file to enforce stringent password policies.
- Opt for passwords with a minimum of 8 characters, incorporating a mix of alphanumeric characters and grammatical symbols.
- Steer clear of easily guessable information like significant dates or common dictionary words.
ii. Utilize Tools for Strong Passwords
Explore the use of a “Password Generator tool” if you encounter difficulties creating robust passwords. These tools can offer suggestions that meet the criteria for strength and complexity.
iii. Server Configuration Settings
- Navigate to “Tweak Settings” within “Server Configuration” to enhance security measures.
- Enable SSL to thwart potential leaks and ensure the confidentiality of sensitive password information.
iv. Additional Verification Measures
For an added layer of assurance, consider testing the strength of your password using tools like JTR cracker or pam_passwdqc.
v. Action Steps
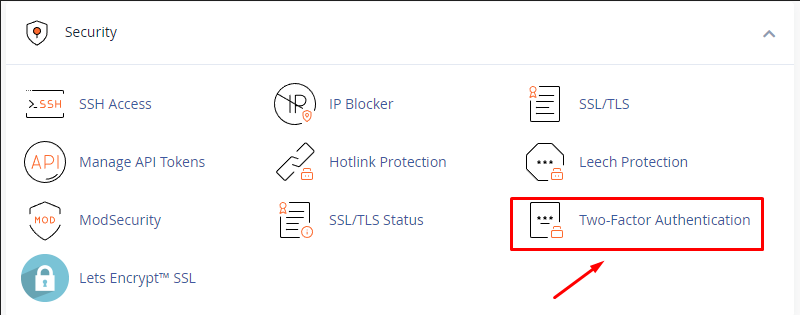
- Regularly review and strengthen password policies to align with evolving security standards.
- Educate users on the importance of robust passwords and provide resources for creating and managing them.
- Implement multi-factor authentication to add an extra layer of security to your systems.
vi. Benefits
- Mitigates the risk of unauthorized access and potential security breaches.
- Empowers users with the knowledge and tools to create and maintain secure passwords.
- Demonstrates a commitment to proactive cybersecurity measures in safeguarding sensitive information.
3. Enhance SSH Security
SSH, or Secure Shell, serves as a vital tool for remote connectivity in Linux, allowing users to log into a remote machine and execute commands. However, the power it grants also presents security risks. Failing to secure SSH can expose systems to potential attacks and compromise sensitive data.
i. Setup Wheel User
- While logged in as the root user, establish a new user with the command:
"adduser <wheel_user_name>". - Set a password when prompted.
- Add the newly created user to the Wheel user group to grant administrative privileges.
- For existing users, this can be done via WHM (Web Host Manager) by navigating to Security Center > Manage Wheel Group Users and selecting the user to add.
ii. Disable Root User Access
- In the SSH configuration file, set “PermitRootLogin” to “No” to restrict direct root access.
- Restart SSH to apply the changes. Subsequently, logging in as the root user will be disabled. Users must now log in with the newly created user or an existing one with Wheel group privileges.
iii. Setup Key-based Password-less Login

- Enhance security by disabling password authentication and allowing SSH access only through key-based authentication.
- Open the SSH configuration file using a text editor (e.g., “vi /etc/ssh/sshd_config“).
Set "PasswordAuthentication" to "no" to disable password authentication.- Generate an SSH key pair on the host machine using the command
"ssh-keygen". The default location for the key will be "/home/user/.ssh/id_rsa" if you press "Enter".iv. Action Steps
- Regularly update SSH packages to ensure the latest security patches are applied.
- Implement the Wheel user setup to enhance user management and restrict root access.
- Transition to key-based authentication to bolster security and eliminate the risk associated with password-based logins.
v. Benefits
- Mitigates the risk of unauthorized access through strengthened user authentication.
- Adds an additional layer of security by restricting root access.
- Enhances overall SSH security, making it a robust and reliable remote connectivity tool.
- By adopting these measures, you contribute to a more secure SSH environment, ensuring that remote connectivity remains a reliable and protected aspect of your Linux system.
4. Bolstering Security for Apache and PHP
i. Importance
Safeguard Apache against potential threats like code injection by enabling ModSecurity. This module employs predefined rules to block connections that deviate from established security protocols.
ii. How to Enable
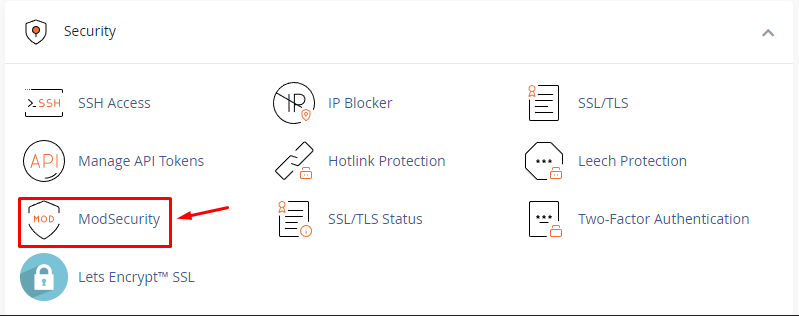
- Access WHM (Web Host Manager) and navigate to Plugins > ModSecurity.
- Activate ModSecurity to fortify Apache against a spectrum of attacks.
iii. Configure suEXEC and suPHP
a. Importance
Enhance security by configuring suEXEC for CGI script execution and adopting suPHP as the PHP handler. This ensures a more secure environment for script execution.
a. Configuration Steps
- In WHM, access Service Configuration > suEXEC.
- Change the PHP handler to suPHP, and enable suEXEC. Save the new configuration.
iv. Enable PHP open_basedir Protection
a. Importance
Prevent PHP scripts from accessing files outside their designated home directory, adding an extra layer of security.
b. Configuration Steps
- In WHM, navigate to Security Center > PHP open_basedir Tweak.
- Enable PHP open_basedir Protection and save the configuration.
v. Disable Select PHP Functions
Mitigate potential security risks by disabling specific PHP functions that could be exploited.
a. Configuration Steps
- In WHM, access Service Configuration > PHP Configuration Editor.
- Select Advanced mode and locate the following settings:
- Restart CSF to apply changes:
"register_globals": - Set to “Off” to control access to server, form, and environment variables.
"disable_functions":- Disable functions like
"allow_url_fopen", "proc_open", "popen", "phpinfo", "exec", "passthru", "shell_exec", "system", "show_source".Save the settings and restart Apache for changes to take effect.
vi. Action Steps
- Regularly update and patch Apache and PHP to address emerging security vulnerabilities.
- Monitor ModSecurity logs for potential threats and adjust rules as needed.
- Educate users on secure coding practices and encourage adherence to best practices.
vii. Benefits
- Mitigates common attack vectors such as code injection and unauthorized file access.
- Enhances the overall security posture of Apache and PHP environments.
- Demonstrates a proactive approach to web server security, safeguarding against potential exploits.
- By diligently following these steps, you fortify your Apache and PHP configurations, creating a more resilient and secure web hosting environment.

5. Implementing Brute-Force Protection
i. Understanding Brute-Force Attacks
Brute-force attacks involve persistent trial-and-error attempts to gain unauthorized access to a server. These repetitive and systematic attacks aim to exploit weak credentials or vulnerabilities.
ii. Enabling Brute-Force Protection
Setting up Brute-Force protection is a crucial step to thwart repeated intrusion attempts. This security measure automatically blocks access from a specific IP address that has made numerous unsuccessful login attempts.
iii. Activation Steps
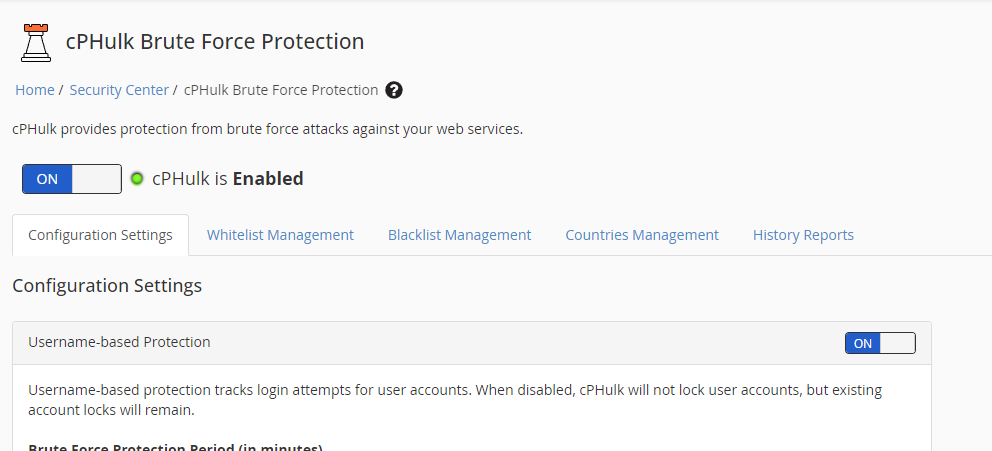
- Navigate to “CPHulk Brute-Force Protection” within the “Security Center.”
- Enable Brute-Force Protection to activate this defense mechanism against unauthorized access attempts.
iv. Utilizing IP Deny Manager
- In addition to Brute-Force Protection, the “IP Deny Manager” provides an additional layer of control over access to your site.
- Access “IP Deny Manager” within cPanel’s options.
- You can block specific IP addresses, domain names, or even entire IP ranges from accessing any site managed by cPanel.
v. Action Steps
- Regularly review Brute-Force Protection settings to align with evolving security needs.
- Monitor logs for any suspicious activity, especially patterns indicative of brute-force attacks.
- Educate users on the importance of strong, unique passwords to mitigate the risk of brute-force attempts.
vi. Benefits
- Mitigates the risk of unauthorized access through brute-force attacks.
- Adds an additional layer of security by automatically blocking malicious IP addresses.
- Provides granular control over access by leveraging the IP Deny Manager feature.
By incorporating Brute-Force Protection and utilizing the IP Deny Manager, you establish a robust defense mechanism against persistent intrusion attempts. This proactive approach contributes to a more secure hosting environment, protecting your server and the sites managed by cPanel from unauthorized access.
6. Activating and Configuring the Firewall
i. Importance of Firewall
The cornerstone of cPanel security lies in maintaining an active firewall, acting as a formidable barrier that denies access to unwanted connections, thus safeguarding the server from potential threats.
ii. Using CSF as the Firewall
CSF (ConfigServer Security & Firewall) is a widely employed firewall for cPanel, known for its ease of management through the WHM interface.
iii. Installation Steps
a. Download CSF Package
Use the following command to download the CSF package:
"wget https://download.configserver.com/csf.tgz"b. Extract and Install
Extract the downloaded tar file:
"tar zxvf csf.tgz"Change to the CSF installation directory:
"cd csf"Execute the cPanel install script:
"./install.cpanel.sh"c. Start CSF Service
Initiate the CSF service:
"/etc/init.d/csf start"d Test Installation Configuration
Verify the installation configuration:
"perl /usr/local/csf/bin/csftest.pl"e. Disable Test Flag
After testing, disable the test flag in CSF configuration:
"vi /etc/csf/csf.conf"f. Restart CSF
Restart CSF to apply changes:
"/etc/init.d/csf restart"g. Access CSF via WHM
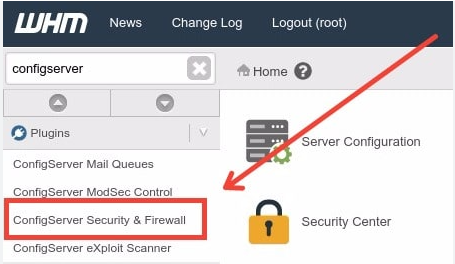
Access CSF through WHM by navigating to Plugins > ConfigServer Security & Firewall.
iv. Configuration Parameters
Adjust the following parameters in CSF to enhance security:
a. Block Excessive Connections
"[CT_LIMIT = "Put Number Here"]"Set the limit for blocking IPs with excessive connections:
b. Permanent IP Blocking
Enable permanent blocking for identified IPs:
"[CT_PERMANENT = "1"]"c. IP Time Limit
Set the time limit for IP blocking to 1800 seconds:
"[CT_BLOCK_TIME = "1800"]"d. Connection Tracking Interval
Adjust the connection tracking interval to 60 seconds:
"[CT_INTERVAL = "60"]"v. Action Steps
- Regularly update CSF to ensure the latest security features are applied.
- Monitor firewall logs for any unusual activity and adjust rules accordingly.
- Educate users on the importance of firewall security and its role in protecting the server.
vi. Benefits
- Enhances server security by preventing unauthorized access.
- Provides a manageable and user-friendly interface through WHM.
- Configurable parameters allow for a tailored security approach based on server needs.
7. Enhance cPanel Security with Essential Plugins
i. RKHunter: Rootkit Protection

a. Understanding the Threat
Rootkits, a prevalent form of malware, operate stealthily, providing unauthorized third-party access to your server. This type of malware grants intruders full control over the information stored on your server and passes through it, posing a severe security risk.
b. Introduction to RKHunter
RKHunter, or Rootkit Hunter, is a crucial plugin designed to defend against rootkit malware. By conducting a comprehensive scan of your server and cross-referencing the results with a database of known rootkits, RKHunter helps identify and eliminate potential threats.
c. Implementation Steps
- Install RKHunter
Utilize the appropriate installation method for your system.
- Conduct Regular Scans
Schedule routine scans to ensure continuous monitoring and detection of potential rootkit intrusions.
d. Benefits
- Detects and removes rootkits, safeguarding the integrity of your server.
- Regular scans contribute to a proactive security stance, preventing potential threats before they can compromise the system.
ii. ConfigServer eXploit Scanner (cxs): Real-Time File Scanning
a. Understanding the Tool

ConfigServer eXploit Scanner (cxs) is a dynamic tool designed for real-time file scanning. It actively examines files as they are uploaded to the server, preventing the exploitation of accounts by swiftly isolating suspicious files in quarantine or deleting them before they become active.
b. Key Features
- Guards against file uploads containing malware such as the Gumblar Virus, PHP, and Perl shell scripts.
- Provides an additional layer of security by intercepting potential threats before they can harm the server.
c. Implementation Steps
- Install cxs
Follow the installation process compatible with your server environment.
- Configure Real-Time Scanning
Adjust settings to enable real-time scanning for uploaded files.
- Regular Updates
Keep cxs updated to ensure it has the latest threat definitions and security features.
iii. Benefits
- Prevents the exploitation of accounts by swiftly isolating and managing suspicious files.
- Acts as a proactive defense mechanism against potential malware threats during the file upload process.
iv. Action Steps
- Regularly update both RKHunter and cxs to ensure they are equipped with the latest security definitions.
- Configure automatic scans and real-time monitoring for comprehensive protection.
- Integrate these plugins into your routine security practices to fortify your cPanel environment against evolving threats.
8. Prioritize Regular Backups
i. Recognizing the Importance
Regardless of how diligently you follow the cPanel hosting security checklist, the ever-present risk of human error remains. Even with every precaution in place, a single oversight could lead to a security breach. This is where backups emerge as a crucial lifeline, acting as a safety net that can rescue your website in the event of unexpected incidents.
ii. The Role of Backups
a. Risk Mitigation
Backups serve as a fail-safe mechanism, providing a recovery point that safeguards against potential data loss or compromise.
b. Scheduled Regular Backups
Establish a routine for regular backups to ensure the continuity of your backup strategy. Scheduled backups help automate the process, reducing the likelihood of oversights.
c. Distributed Backup Locations
Store copies of your website backups in locations separate from the server. This strategic placement ensures redundancy, allowing you to retrieve a clean copy even if the server faces compromise.
iii. Quality Hosting Companies and Backups
Reputable hosting providers prioritize regular backups as a standard security practice. For instance, at BigCloudy, we not only emphasize the importance of backups but also conduct regular tests to verify their effectiveness.
iv. Action Steps
- Establish a consistent backup schedule, considering the frequency of updates and changes to your cPanel hosting website.
- Diversify backup storage locations to reduce dependency on a single point of failure.
- Periodically test the restoration process to verify the integrity of your backup files.
v. Benefits
- Safeguards against potential data loss due to unforeseen circumstances.
- Ensures a clean and reliable recovery point for your website.
- Provides peace of mind, allowing you to confidently navigate unforeseen challenges.
- By making regular backups an integral part of your cPanel hosting security strategy, you not only fortify your website against potential threats but also create a resilient foundation for recovery in the face of unforeseen challenges.
Conclusion
In conclusion, embracing the cPanel Hosting Security Best Practices for 2024
equips your web hosting endeavors with a robust shield against evolving cyber threats. By implementing proactive measures such as regular updates, secure password management, and strategic firewall configurations, you fortify your online presence. Remember, security is not a one-time effort; it’s an ongoing commitment.


