


Creating a professional and visually appealing website is crucial for any business or personal brand in today’s digital age. WordPress, the world’s most popular content management system, combined with Elementor, a powerful drag-and-drop page builder, provides an accessible and efficient way to build stunning websites without needing extensive coding knowledge. This guide will walk you through the process of creating a WordPress site using Elementor, from understanding what WordPress Elementor is to advanced design techniques and site management.
Table of Contents
- What is Elementor?
- Benefits of Using Elementor for Building WordPress Sites
- Prerequisites
- Installing Elementor
- WordPress Elementor Free and Pro Versions
- How to Upgrade to Elementor Pro?
- Build Your Website with WordPress Elementor
- Leveraging Elementor Templates for Streamlined Design
- Essential Plugins to Use with WordPress Elementor
- Integrating Forms, Sliders, and Other Interactive Elements
- Publishing and Managing Your Site
- Backup and Security Recommendations
- Building a Secure and High-Performance Website with BigCloudy
- Conclusion
What is Elementor?
Elementor is a leading WordPress page builder plugin that enables users to create beautiful and functional websites using an intuitive drag-and-drop interface. It was launched in 2016 and has quickly become one of the most popular tools for WordPress site design due to its ease of use and powerful features.
Benefits of Using Elementor for Building WordPress Sites
1. User-Friendly Interface
Elementor’s interface is designed to be accessible for beginners while offering advanced options for experienced users. The drag-and-drop functionality allows you to see changes in real-time, making the design process straightforward and efficient.
2. Customization
Elementor lets you design your website exactly how you want, from top to bottom. This includes fonts, colors, spacing, and layout. You can also add custom CSS for even more detailed customization.
3. Templates and Blocks
Elementor offers a vast library of pre-designed templates and blocks that can be easily customized. This feature is particularly useful for those who need to create a site quickly but still want it to look professional.
4. Responsive Design
Websites built with Elementor are mobile-friendly by default. The tool includes features that allow you to adjust your design specifically for different devices, ensuring a consistent user experience across all platforms.
5. Third-Party Integration
Elementor integrates seamlessly with many popular WordPress plugins, enhancing the functionality of your site with features like forms, sliders, and e-commerce capabilities.
Comparison with Other Page Builders
While there are several page builders available for WordPress, Elementor stands out due to its comprehensive free version, regular updates, and extensive community support. Alternatives like WPBakery and Divi Builder also offer robust features, but Elementor’s user-friendly interface and flexibility make it a preferred choice for many users.
Prerequisites
Before diving into creating your WordPress site with Elementor, there are a few prerequisites you need to have in place:
i. Domain and Hosting
- Domain Name
This is your website’s address on the internet (e.g., www.yoursite.com). Choose something easy to remember that represents your business! - Hosting Provider
A hosting provider stores your website’s files and makes them accessible on the internet. By selecting a reliable web hosting provider like BigCloudy, you gain access to the tools and resources necessary to build a secure, high-performing website. BigCloudy’s commitment to speed, scalability, and user-friendly development tools empowers you to create a website that excels in both functionality and user experience.
ii. Installing WordPress
Once you have your domain and hosting set up, the next step is to install WordPress. Most hosting providers offer one-click WordPress installation, making the process simple and quick. Follow these general steps:
- Log in to your hosting account.
- Find the WordPress installation option (usually under a section like “Website” or “Software“).
- Click on the installation button and follow the prompts, entering your site’s name and admin credentials.
Installing Elementor
With WordPress installed, it’s time to add Elementor to your site.
Step-by-Step Guide to Installing the Elementor Plugin
- Access the WordPress Dashboard
Log in to your WordPress admin panel. - Navigate to Plugins
Go to “Plugins” > “Add New“. - Search for Elementor
In the search bar, type “Elementor” and press Enter. - Install and Activate
Find the Elementor Page Builder plugin, click “Install Now“, and then “Activate“.
WordPress Elementor Free and Pro Versions
Elementor is a “freemium” software solution, offering both a free core plugin and a paid Elementor Pro license.
The free version of Elementor provides all the essential tools required to create visually-appealing sales pages, product listings, business websites, and more. It includes over 40 widgets, 100 templates, and more than 300 pre-designed section templates (blocks) that can be combined to create unique designs.
For those seeking advanced functionality, Elementor Pro is available for purchase. Upgrading to Elementor Pro unlocks additional widgets and grants access to Elementor’s Theme Builder.
i. Elementor Theme Builder
With the Theme Builder, users can edit virtually every element of their site, including headers and footers. It also allows for the creation of custom post and archive page designs.
ii. Elementor WooCommerce Builder
For online store development, Elementor Pro includes a WooCommerce Builder. This tool enables customization of WooCommerce content such as product pages, product archives, and checkout pages. Additionally, it offers widgets specifically designed to enhance conversions, such as Custom Add To Cart, Upsells, and Product Related.
iii. Popup Builder and Form Builder
Elementor Pro also features a Popup Builder and a Form Builder. While there are other plugins available for creating forms and popups, using Elementor minimizes the number of plugins needed, which can improve site security and performance. A consistent design is easier to maintain when all elements are designed within the same platform.
iv. Elementor Pro Website Kits and Support
Elementor Pro licenses include access to over 60 professional website kits. These kits comprise templates, pages, popups, and other components to help build a complete website. Expert licenses and higher include access to 20 additional expert website kits.
Every Pro license comes with premium support, typically providing responses from Elementor’s specialist team within one day. For those opting for Elementor Pro Studio or higher, VIP support is available, offering live chats with the VIP Support team and priority responses within 30 minutes.
v. Elementor Experts Network
Agencies, developers, and designers may be interested in the Experts Network profile, which allows them to showcase their work and attract potential clients. The Experts Network is accessible through the Expert, Studio, or Agency licenses, which also enable profile creation on this popular marketplace.
vi. Pricing and Guarantee
Elementor Pro plans range from $59 to $399 per year, with a 30-day money-back guarantee, allowing users to try the service risk-free.
- Essential Plan
$59 per year for a single site. - Advanced Plan
$99 per year for up to three sites. - Expert Plan
$199 per year for up to twenty-five sites. - Agency Plan
$399 per year for up to one thousand sites.
How to Upgrade to Elementor Pro?
There are two methods to connect Elementor Pro to your WordPress site. If you have not yet purchased an Elementor Pro license, begin by visiting the Elementor official website and selecting “Get Started.”
Follow the onscreen instructions to create an Elementor account. During this process, you will be asked to provide information about the type of website you wish to create.
- Creating an Elementor Account
- Visit the Elementor official website.
- Select “Get Started.”
- Follow the prompts to create an Elementor account.
- Provide details about your intended website.
Next, select the plan you wish to purchase. Since Elementor requires an active WordPress website, you will need to enter your site’s domain. Elementor will then verify that your site is running on the WordPress platform.
Assuming your WordPress website is active, proceed by clicking on “Install Elementor.” If you are logged into your site, you will be automatically redirected to the Elementor plugin page.
When prompted, click “Install Now” followed by “Activate.” Elementor will then add the page builder plugin to your site.
Installing Elementor Pro with an Existing License
If you already have an Elementor Pro license, navigate to the Elementor official website and log in using the credentials provided in your confirmation email.
In your Elementor account, select “Subscriptions” from the left-hand menu. Then, click “Download Zip” to download the plugin.
By following these steps, you will successfully connect Elementor Pro to your WordPress site, unlocking its powerful design and customization features.
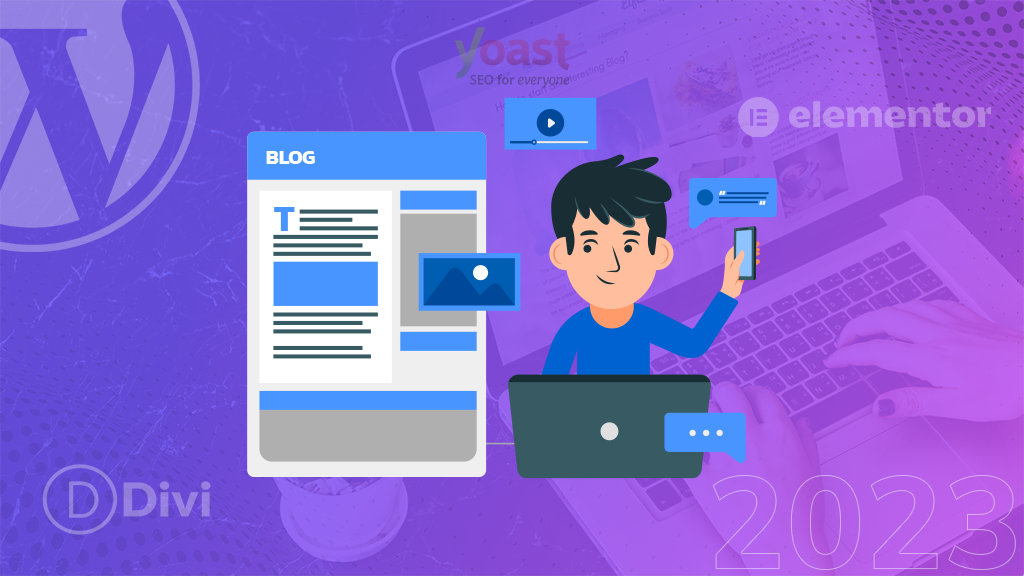
Build Your Website with WordPress Elementor
This guide provides a concise overview of the core functionalities within the Elementor page builder plugin for WordPress. We’ll delve into the essential steps involved in crafting your website design using Elementor, ensuring a smooth and efficient workflow.
1. Activating the Elementor Editor
- To access the Elementor interface for designing a new page or post, navigate to “Pages” or “Posts” within the WordPress dashboard and select “Add New.” Subsequently, click on “Edit with Elementor” to launch the editor.
- Alternatively, if you wish to redesign an existing page, locate the desired page in your dashboard and open it for editing. Click on the “Edit with Elementor” button to proceed.
2. Familiarizing Yourself with the Interface
- Upon launching the Elementor editor, you’ll encounter the sidebar on the left-hand side of the screen. This sidebar houses a comprehensive library of pre-built elements, such as buttons and headings, that you can readily integrate into your designs.
- The sidebar also features a dedicated “Global Widgets” section. This section allows you to save frequently used widgets for effortless reuse across multiple website elements. This streamlines your workflow by providing a central location for managing and editing these custom elements, ensuring consistency across your entire website.
- To the right of the sidebar lies the live preview canvas. This is where your design comes to life. As you make edits and adjustments, Elementor automatically updates the canvas in real-time, allowing you to visualize your website’s appearance instantaneously.
3. Constructing Your Layout with Sections, Columns, and Widgets
- The cornerstone of Elementor’s design process lies in three fundamental building blocks: Sections, Columns, and Widgets. We’ve previously established the vast collection of widgets available within the plugin. Now, let’s explore how to effectively incorporate these elements into your website structure.
- Typically, your design journey begins with the creation of a Section. To achieve this, click on the “+” icon within the main canvas. Elementor will prompt you to “Select Your Structure,” providing you with layout options consisting of one or more Columns.
- These Columns serve as the foundation for housing your chosen widgets, enabling you to organize your content in a structured and visually appealing manner.
4. Customizing Your Design
- Once you’ve selected your desired column structure, Elementor will seamlessly add the Section to your layout. To reposition a Section, simply click on it and utilize the dotted blue handle that appears for dragging and dropping.
- For basic modifications such as duplicating or deleting a Section, Control-click on the dotted blue handle. This action triggers a context menu, offering you these options alongside others.
- You can also access further advanced editing options by Control-clicking the blue handle and selecting “Edit Section.” This expands the Elementor sidebar to display additional customization possibilities for that specific Section.
5. Integrating Widgets
- To populate your Sections with content, locate the desired widget within the Elementor sidebar and drag it onto the main canvas. As you drag the widget, Elementor will intuitively highlight compatible Sections and Columns where you can place the element.
- Release your mouse button once you’ve identified the optimal location for the widget. Elementor will then seamlessly integrate the widget into your chosen Section.
6. Managing Site-Wide Settings
- Elementor empowers you to manage settings that apply to your entire website. This includes customizing the default font family and HTML color scheme. Additionally, you can modify the borders and shadows applied by WordPress to various elements, such as images.
- Modifying these settings at a global level ensures a consistent visual identity throughout your website. This approach is not only aesthetically pleasing but also significantly more efficient than applying these changes on an individual page basis.
- To access these site-wide settings, click on the hamburger menu located within the Elementor sidebar.
7. Utilizing Revision History
- While you’re actively designing your website, Elementor meticulously records every change you make. This revision history acts as a safety net, allowing you to revert to previous versions if necessary. This feature is particularly valuable if you realize you’ve made an unintended modification.
- Furthermore, Elementor’s revision history fosters experimentation. You can confidently test out design variations and effortlessly undo them if needed. By encouraging exploration, Elementor empowers you to refine your website and achieve a more polished final product.
- To access the revision history, click on the “History” icon situated at the bottom of the sidebar. The “Actions” tab meticulously records every single change you’ve made within Elementor, from creating a new Section to editing existing text content.
8. Maintaining Optimal Performance
- BigCloudy offers robust hosting plans specifically optimized for WordPress websites. These plans cater to the unique needs of WordPress, ensuring your site runs smoothly and efficiently. Additionally, BigCloudy includes features like Content Delivery Networks (CDNs) in our plans.
- CDNs store website content on geographically distributed servers, delivering content to users from the closest location. This significantly reduces page load times, especially for visitors located far from your main server.
- Regularly perform website maintenance tasks such as clearing your cache and optimizing images. These actions help minimize file sizes and streamline website performance.

Leveraging Elementor Templates for Streamlined Design
Elementor streamlines website development by offering a comprehensive library of pre-designed templates. These templates encompass two primary categories:
- Pages
These templates represent complete website layouts, offering a foundation for you to build upon. They include pre-defined sections for headers, content areas, footers, and other essential website elements. - Blocks
Blocks are more focused elements, consisting of pre-configured sections that house specific functionalities like footers, headers, or FAQ sections. These blocks can be seamlessly integrated into any page within your website.
Key Features of Elementor Templates
i. Extensive Library
Elementor provides a vast selection of templates to cater to diverse website needs. You can browse them by page type, template name, or relevant tags to locate the perfect starting point for your design.
ii. Complete Customization
While templates offer a solid foundation, they are fully customizable. You can readily modify the content, layout, and styling to perfectly match your brand identity and design vision.
iii. Mobile Responsiveness
All Elementor templates are inherently mobile-responsive, ensuring your website displays flawlessly across various screen sizes and devices.
iv. Effortless Integration
Inserting a template into your website is a simple one-click process. Navigate to the “Add Widget Here” section within the Elementor editor, click the folder icon, and browse the library to select your desired template.
Utilizing the Template Library
- Within the Elementor editor, locate the “Add Widget Here” section at the bottom of the page and click on the white folder icon.
- This action triggers the Elementor template library to load. You can preview a template by hovering over it, clicking the magnifying glass icon, or clicking directly on the image.
- Once you’ve identified your preferred template, click the green “Insert” button.
- If you haven’t previously connected to the Elementor template library, you’ll be prompted to do so. This typically involves registering or logging in to your Elementor account.
- Once your connection is confirmed, return to your editing page and click “Insert” again to finalize the template integration. Your chosen template will be loaded and ready for customization.
Additional Considerations
While Elementor templates offer a significant advantage in terms of design efficiency, it’s important to remember that they are not one-size-fits-all solutions. Always tailor the template to your specific needs and brand identity to achieve a truly unique website.
Essential Plugins to Use with WordPress Elementor
Elementor works well with various plugins to enhance your site’s functionality.
i. Elementor Addons
Plugins like Essential Addons and Premium Addons provide additional widgets and features.
ii. SEO Plugins
Yoast SEO and Rank Math are popular plugins that can help you optimize your website content and improve your search engine ranking.
iii. Performance Plugins
WP Rocket and W3 Total Cache are caching plugins that can help improve your website’s performance and loading times.
SEO and Performance Optimization Plugins
- SEO Plugins
Optimize your content with plugins like Yoast SEO, which provides on-page SEO recommendations and readability analysis. - Caching Plugins
Improve load times with caching plugins such as WP Rocket, which offers extensive performance optimization features. - Image Optimization
Use plugins like Smush or ShortPixel to compress images and reduce page load times.

How to Optimize Your E-commerce Product Pages for SEO?
Sept 26, 2023
Integrating Forms, Sliders, and Other Interactive Elements
i. Forms
Use Elementor Pro’s Form widget or integrate with plugins like WPForms or Contact Form 7.
ii. Sliders
Add interactive sliders using Elementor Pro’s Slider widget or third-party plugins like Smart Slider 3.
iii. Other Elements
Incorporate elements like countdown timers, accordions, and tabs to enhance user engagement.
Publishing and Managing Your Site
After designing your site, it’s time to publish and manage it.
i. Previewing and Publishing Your Site
- Preview Changes
Use the preview button in Elementor to see how your page looks before publishing. - Publish
Once satisfied, click the “Publish” button to make your page live.
ii. Tips for Managing and Updating Content
- Regular Updates
Keep your WordPress, themes, and plugins updated to ensure your site remains secure and functions smoothly. - Content Management
Regularly update your site’s content to keep it relevant and engaging. Use Elementor’s drag-and-drop editor to make quick changes to text, images, and other elements. - Revisions
Utilize WordPress’s revision history feature to track changes and revert to previous versions if needed.
Backup and Security Recommendations
- Regular Backups
Implement regular backups using plugins like UpdraftPlus or BackupBuddy. Store backups in multiple locations (e.g., cloud storage, local devices) to safeguard against data loss. - Security Plugins
Protect your site with security plugins like Wordfence or Sucuri. These plugins offer features such as firewall protection, malware scanning, and login security. - SSL Certificate
Ensure your site uses an SSL certificate to encrypt data and provide a secure browsing experience for your visitors. Most hosting providers offer free SSL certificates through Let’s Encrypt.
BigCloudy understands the importance of website security. They offer various SSL certificates, including:
- Single Domain SSL
Protects a single domain name. - Multi-Domain SSL
Secures 5 domain names under a single certificate. - Wildcard SSL
Covers unlimited subdomains with 4096-bit encryption.
Building a Secure and High-Performance Website with BigCloudy
BigCloudy goes beyond just providing hosting. They offer a comprehensive suite of features designed to optimize your website’s performance and security. Here’s a glimpse into what BigCloudy has to offer:
i. Enhanced Performance with LiteSpeed Web Servers
BigCloudy utilizes LiteSpeed web servers, known for their superior performance compared to traditional Apache servers. This translates to faster page loading times for your visitors, keeping them engaged and improving your website’s overall user experience.
ii. Optimized Stack for Speed and Scalability
BigCloudy leverages a powerful combination of technologies like Nginx, Redis, Varnish, and Memcached. This optimized stack efficiently caches data and manages resources, ensuring your website remains responsive and handles traffic surges smoothly.
iii. Effortless Website Creation with One-Click Staging
BigCloudy simplifies website development with its one-click staging platform. This allows you to create a test environment where you can experiment with code, plugins, and design changes without affecting your live website. Once you’re satisfied with the modifications, deploying them to your live site is a breeze.
Conclusion
Creating a WordPress site using Elementor is a straightforward process that empowers you to build professional and visually appealing websites without the need for extensive coding knowledge. With Elementor’s intuitive drag-and-drop interface, you can customize every aspect of your site to match your unique vision.
By following these guidelines, you’ll be able to create a website that not only looks great but also performs well, providing a seamless user experience for your visitors. Whether you’re a beginner or an experienced web designer, WordPress Elementor offers the flexibility and functionality needed to bring your website ideas to life. Embrace the power of WordPress Elementor and start building your dream website today